When working on a project, the temptation is strong to make everything perfect before showing it to the world, or even just to your co-workers. You know each and every line of code you wrote, but you have a long list of bugs to fix and don’t want to expose your work until you’re completed everything that was on your TODO list. Shipping is scary, so you’re holding back with the excuse that you need to fix another bug before finishing.
If you want to make software people use and enjoy, and not just write code for the sake of it, you must get over yourself and ship! I’ve seen people holding onto code for ages, polishing it to perfection, only to leave the job before anyone had time to see the results and give valuable feedback.
The same goes if you wish to get feedback on code you’re doing as a side project. If you’re not shipping, nobody will be able to comment on your code and you won’t know if you’re going in the right direction. Agile methodologies have the right ideas about this. Getting used to shipping small changes will help you fight the urge to keep your code to yourself and having to push huge modifications at once because you’ve been playing it safe.
Also, we tend to underestimate the value of our software. A tool that will help improve business processes will be used and appreciated if it does the job, warts and all. When an application makes people’s work easier, they won’t mind putting up with some bugs for a while until you have time to fix them.
You want to validate with your users that you built the right thing as soon as possible, and there are many flaws you’ll see only when people are using your product. What if the incomplete feature you were planning to spend a few weeks on is not really needed? Better to know right away instead of sinking a lot of time into it.
The caveat is that you must allow time to go back and fix those problems when they’re found. On the other hand, you don’t want to fall victim to “ship the prototype” syndrome: if every time you show a quick and dirty prototype it ends up in production, you must make sure that what you show is solid and well-structured even if it’s incomplete. Shipping something is an important milestone, but it’s not the end of the project.
After a few years working with the same framework and language, you have stopped learning new ones. Life got in the way of learning and you let the habit die down, since the knowledge you have is enough to do your job well.
But now, you’re finding yourself worried about your skills and job prospects: your web stack is outdated and the market has moved on to something else. Change for the sake of change is absurd, but you’ve reached the point where putting some effort into it is warranted if you don’t want to stay stuck maintaining legacy ASP.NET WebForms or ColdFusion applications forever.
Fortunately, if you need to update your skills, you can pick up things where you left them and learn a new stack in a few months to a year depending on the free time you have. Many tools and frameworks have risen and fallen since you stopped learned, but the same patterns and practices are used. The tools are better, but nobody will mind if you missed a few frameworks along the way.
It’s easy to get overwhelmed by all the choices available, but you don’t need to spend ages evaluating which web stack you’ll pick up: all the popular ones are worth learning. If you don’t have a preference, choose the one that’s most popular for the kind of job you want to do. For example, startups are more likely to use NodeJS and Ruby on Rails on the backend, but in big businesses ASP.NET MVC or Java is common.
When you start working on a new project, it’s doubtful that the stack is going to be identical, so you don’t worry about the details:. The point is to learn what a modern stack look like and not a specific set of tools: if your knowledge of JavaScript, HTML and CSS is solid, you won’t have trouble adapting.
I’ve written a lot about learning as a software developer, but if you already know what’s your specialty and you only want to update your skills, you can follow this quick and dirty plan:
Step 1: Follow a course or a book that describes a good development workflow using your new stack.
Step 2: Build a small application on your own to apply the concepts you learned.
Step 3: Work with others on a project. It’s not always possible, but this will cement your learning.
You won’t be comfortable with your new tools right away, and you need to keep an open mind to get the most out of your learning. But it’s worth putting in the time and effort to learn a new stack so you can take pride in your skills instead of just scrapping by with knowledge you know is obsolete.
Learning how to build a mobile application is a good project to improve your programming skills while learning to work in a different environment than the desktop or a web browser. You can get started without worrying about a large stack, making it easy for a beginner to pick it up and start playing with quickly.
Building applications with the Android SDK is self-contained if you stick with the standard libraries. You only need to download the package from Google containing all the tools and you’re ready to go. If you know object-oriented programming and how layouts are done for the web, many patterns and practices will feel familiar to you. The barrier to entry is low: all the tools are free, so you only need an Android device and your computer to get started.
Also, the open philosophy of Android means that you can do as you wish with your applications and your device. As long as you have an installer file (.apk), you can distribute your application to any device. It’s easy to send a copy of your application to your friends so they can test it out. This is great if you have a small project that you only want to deploy on a few machines such as a kiosk an art project. Once you have more experience, there are many open source libraries that improve on what is available in the SDK, and the open source community is active and welcoming.
The following will teach you how to get up and running with the samples included with the Android SDK.
Setting up an Android development environment
You don’t need much to get started with Android. Any decent PC, Mac or Linux box will do the job. All the tools are free, and you can install them as a single package from the Google Android Developers site at https://developer.android.com/sdk/.
There are two main tools you need to know about: the Android SDK Manager and the Android Studio IDE.
The Android SDK Manager is used to download the libraries, tools, system images and code samples for the platform (version) of the Android OS you want to develop for. By default, the package contains the latest version of the SDK Platform (6.0/API level 23 as I’m writing this). When a new version comes out or a new developer kit is available, you must download it using the SDK Manager.
The Android Studio IDE is where you’re going to spend most of your time. It is based on IntelliJ and includes a code editor, a layout editor and all the tools you need to compile your application and debug it on an emulator or on your Android device. Eclipse was previously available as an IDE so you’re going to see some references to it online, but Android Studio is now the official IDE for Android and everybody is now using it.
Installing the drivers for your tablet
By default, when you plug in an Android device in your computer, you’ll see the content of the external storage like you would see the content of a USB key. It’s enough to upload data, but if you want to debug an application on your device, you must install the drivers. You could develop applications using the emulator, but it’s a lot slower and it’s going to be hard to see if the touch interactions work as you intended.
If you have a Nexus device, the drivers are available from the Android SDK Manager. For other manufacturers like Samsung or ASUS, you can find the driver on their website. It’s not always clear what you should download, since the driver is often packaged with other software such as synchronization tools.
To be able to attach a debugger, you must also enable the debugging mode on your device by navigating to the About option in the Settings menu. Click 10 times on About and the Developers Options menu will appear, allowing you to set the debugging mode.
Running the sample projects from the Android SDK
The language used with the Android SDK is Java, but Android has its own virtual machine, Dalvik, that uses a subset of the standard Java classes. Since it’s such a small subset of Java, you don’t need experience in Java to get started. If you have a good basis in any object-oriented language, you should be able to pick it up pretty fast. The rest of the files, such as language files and layouts, are in XML.
To get started quickly, I’m going to show you how to run one of the sample projects. Those samples are from Google and they are a good starting point to learn what you can do in an Android application and how to do it. Google regularly adds new samples as new APIs becomes available, so check them before trying to do something.
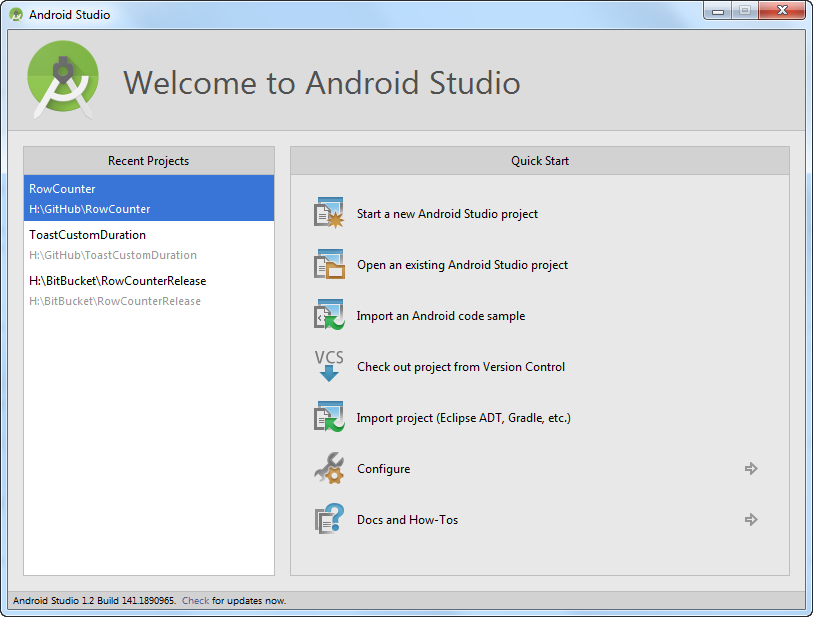
When you start Android Studio for the first time, you’ll see the following screen. To get started running an application right now, just select Import an Android code sample to create a project.
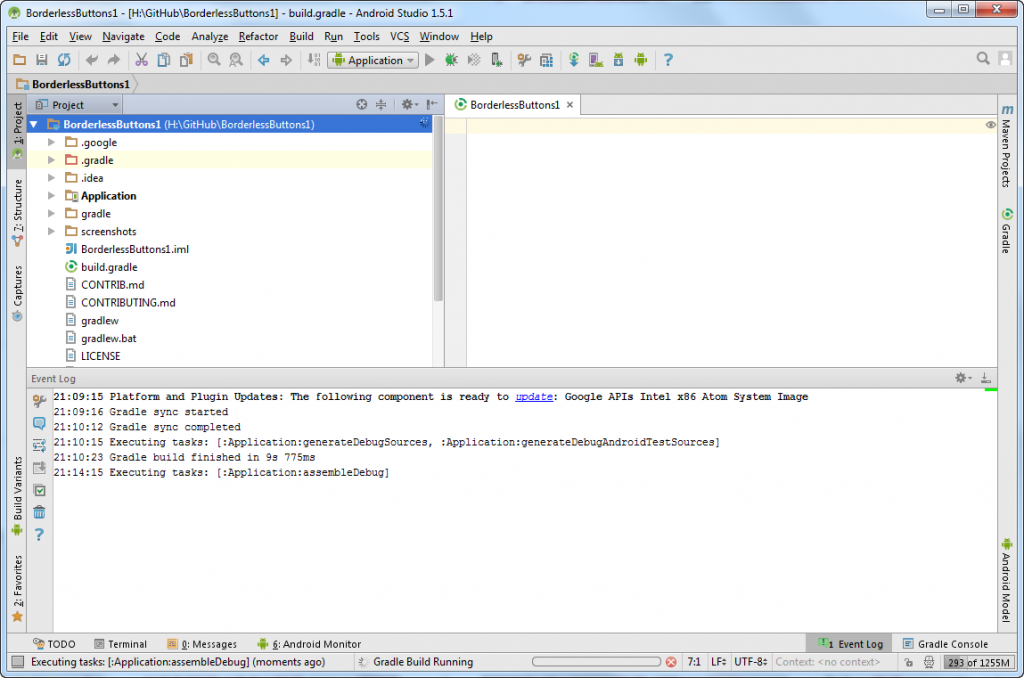
In the following screen, choose the Borderless button example and click Next to create the project:
Once the project is loaded, select Debug… from the Run menu to launch the application in debugging mode on your device. A Device Chooser window will pop up, allowing you to select your device (if the driver has been properly installed) or to launch the emulator. Press OK and the sample will run on your device.
You can now play with the sample and add breakpoints in the source code (located in the Application\src\ folder) to see how it behaves. For example, you can put a breakpoint in the onCreate method of the MainActivity.js file, and try to understand how it behaves when you rotate your device.
 If you want to make software people use and enjoy, and not just write code for the sake of it, you must get over yourself and ship! I’ve seen people holding onto code for ages, polishing it to perfection, only to leave the job before anyone had time to see the results and give valuable feedback.
  But now, you’re finding yourself worried about your skills and job prospects: your web stack is outdated and the market has moved on to something else. Change for the sake of change is absurd, but you’ve reached the point where putting some effort into it is warranted if you don’t want to stay stuck maintaining legacy ASP.NET WebForms or ColdFusion applications forever.
 Learning how to build a mobile application is a good project to improve your programming skills while learning to work in a different environment than the desktop or a web browser. You can get started without worrying about a large stack, making it easy for a beginner to pick it up and