How to get started with Android development – Layout Managers
 At the end of my last article, I left you hanging after describing activities, without telling you how to build a UI, so here we go. In the Android SDK, layouts are separate from the Java code that defines how an activity behaves. Using this separation of concern, it’s easier to modify the layout without having to worry about the code.
Android layouts are in XML, and are located in the res\layout folder. You can have multiple versions of a layout for various orientations, screen size or culture and the Android SDK will choose the right one according to the device. We won’t worry about this right now; for simple layouts one version is enough.
In this article, I’m going to show you how to use a layout manager to position a widget, called a View in the Android SDK, using XML and Java. Next time, I’ll complete this explanation with more details about views themselves, and how they can be controlled in the layout or programmatically.
There is also a designer tool in Android Studio to help build your layouts. I’ll stick to the code for now since I believe it’s best to understand how things are built manually first, and then you’ll know enough to be able to explore it on your own.
Your First Layout
Here is a simple layout with two TextView views, each showing a text string, inside a LinearLayout layout manager in the res\layout\activity_main.xml file:
<?xml version="1.0" encoding="utf-8"?>
<LinearLayout
    xmlns:android="http://schemas.android.com/apk/res/android"
    android:layout_width="match_parent"
    android:layout_height="match_parent"
    android:orientation="horizontal">

    <TextView
        android:layout_width="100dp"
        android:layout_height="100dp"
        android:text="My first textview"/>
    <TextView
        android:layout_width="100dp"
        android:layout_height="100dp"
        android:text="My second textview"/>
</LinearLayout>
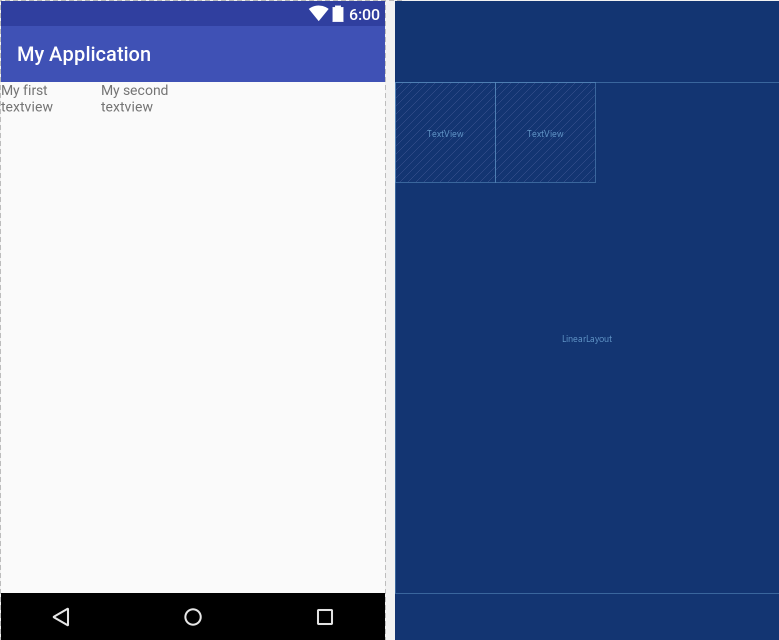
Each layout has a least one view as a root, but it’s usually a layout manager such as the LinearLayout, RelativeLayout or ConstraintLayout since those views are built to position other views. I used the linear layout in this example since it’s simple to understand: if the property android:orientation is set to vertical, all the views will be aligned one over the other, and if set to horizontal they will be side by side.
To use your layout with your activity, you must set the layout in the onCreate() event of the activity using the setContentView() method :
public class MainActivity extends Activity {
    @Override
    protected void onCreate(Bundle savedInstanceState) {
        super.onCreate(savedInstanceState);
        setContentView(R.layout.activity_main);
    }
}
Views and Layout Managers Properties
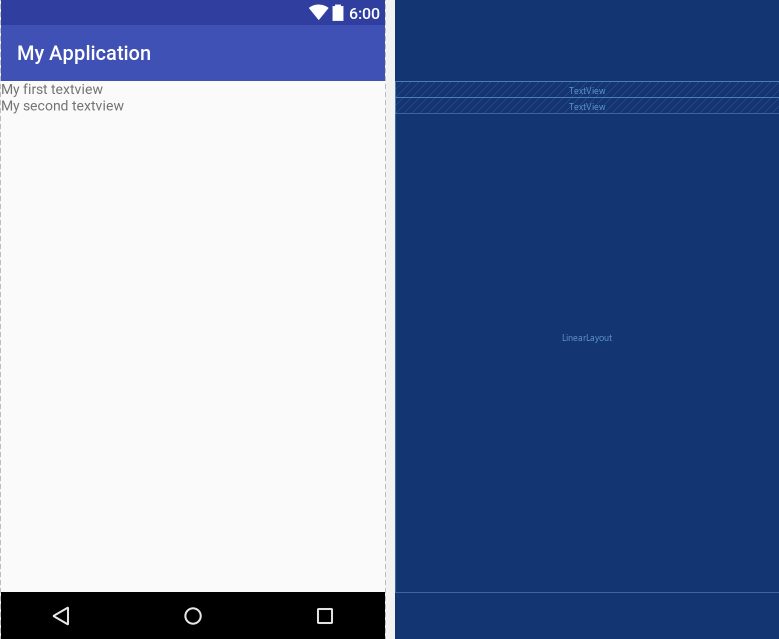
All views, including layout managers, have proprieties that can be added to their XML declaration to control their size and padding. For example, you can specify an android:layout_height and android:layout_width in dp (density-independent pixels) like the layout above, or use the wrap_content and match_parent values:
- wrap_content: The size (width or height) of the view will be the size required to display its content. For example, if you have a very long view showing text, you’ll use wrap_content as the height so it doesn’t get truncated at the bottom.
- match_parent: The size (width or height) of the view will be the same as the size of its parent layout element. This used to be called
fill_parentin API level 7 and less, so you’ll still see that name from time to time.
<?xml version="1.0" encoding="utf-8"?>
<LinearLayout xmlns:android="http://schemas.android.com/apk/res/android"
              android:layout_width="match_parent"
              android:layout_height="match_parent"
              android:orientation="vertical">
    <TextView android:layout_width="match_parent"
              android:layout_height="wrap_content"
              android:text="My first textview"/>
    <TextView android:layout_width="match_parent"
              android:layout_height="wrap_content"
              android:text="My second textview"/>
</LinearLayout>
Each layout manager also has properties to control the positioning of the views they contain, such as the android:orientation for the LinearLayout described previously.
Layout managers can be nested to create complex layouts: for example, you can add a vertical linear layout inside a horizontal linear layout or a grid layout. Still, to make rendering more efficient, you should be careful to avoid nesting too many layouts.
So next time, we’ll take a look at how to use complex views that requires an interaction from the user, and how control those views from your Java code.
See the other articles in the series here